
 |
| A gorgeous pair of Christmas Paper Art Sculptures, standing @ 30cm and 40cm tall. |
Some mediums just lend themselves to certain things, and by it's very nature mixed media lends itself very well to sculpture. I made these two awesomely unique looking paper trees today and will be selling them at the upcoming Families On The Green fete. I thought that the timing was wonderful to allow me to share a tutorial on how they were made.
They are fairly simple structures but they are quite time intensive, so you'll need to allow yourself the better part of a day to get them made. The supplies you'll need are as follows:
2 sheets of 12 x 12" heavy weight brown cardstock or similar.
Some pages from an old book, or old sheet music would look great as well.
Approximately 3 mtrs of ribbon of your choice.
Roughly 76" (or 2mtrs) of 20 gauge copper wire.
A full 30mtr (32 yards) spool of 26 gauge copper wire.
Double sided tape.
Thick white paint (I use Matisse Structure).
Black and Blue glitter.
Spray Adhesive.
Hot glue and glue gun.
Needle nose pliers.
Scissors.
Paper doilies (optional).
Green watercolour (optional).
Small amount of cello tape.
Small amount of brown craft or framers tape (the waxy kind).

First off you need to make two cone shapes from your cardstock. I used the whole 12 x 12 sheet for the bigger one, and I cut a square about 8 x 8" for the second one. (You'll use more of that second sheet later on so don't get rid of it). To make the cones, simply roll from one corner in towards the diagonal opposite corner and allow the shape to form itself naturally. Adjust it until you're satisfied with the size and then tape it at the top and the bottom.
All of the following instructions are written for one tree - simply reduce the size of the wire and ribbon needed by about a third and repeat all the instructions for the second tree.


Your next step is to make the stars for the tops. To do this, cut two 12" pieces of the heavier 20 gauge wire and roughly form each into a triangle shape. Don't be too concerned about getting it perfect; it is an art piece after all, it doesn't need to be crisp and perfect. In fact, it will look better if it's a bit wonky. To secure the triangle simply wrap one end of the wire around the other end, and then just push it into your shape you want.

Next take both triangles and slip one inside the other so they kind of interlace each other.

Then to secure it into the star shape simply take six 2" pieces of the same wire, and use each piece to wrap over the corners so it looks something like the image below.

Put your star aside for the time being and take another piece of the same gauge wire about 8" long this time. Grab your larger cone and make a very small slit in each side of the top, just big enough to thread the wire through. Then thread that 8" piece through and pull both sides of the wire up so that they are equal and then wrap one side around the other to secure it in place (as in the image below.)

Leave the other end sticking straight up, and then take some brown craft tape and wrap around the top of the cone to sort of squish it into itself as well as hold the wire in place as seen in the picture below.

Now it's time to work on the paper structure. For the larger one I used paper doilies on the bottom, but that's optional. I didn't use them for the smaller one. Take your book pages and your doilies if you are using them, tear them up (tear the pages in half down the whole page for the book pages, tear the doilies in half). *Optional step here: I used a very light green watercolour wash painted very roughly over the papers I was using and let them dry - I like it better with the green, but it's completely up to you*

Take some double sided tape and use that to stick your papers down over the cone. Don't be too careful with it - the first layer is just to cover the cone. Overlap the pieces. I found it easier to run a strip of double sided tape right around the entire cone and then I could just slap on the paper.


Once your first layer is done, take some more tape and wrap the cone again, as in the picture below (the tape still has the paper on it in the first picture).

Then take some more paper and roughly tear it into triangle shapes. Layer each 'triangle' over the one before it, at this layer keeping the direction all the same. IE, if the flat side of the triangle is at the bottom, put them all on that way or vice versa.

Once that layer is done, take some more 'triangle' shapes and layer them over the whole thing in the opposite direction. Be sure to use slightly smaller triangle shapes at the top of the cone. At this point, you can also use ordinary rectangle shapes as well. Fill in any gaps, and add extra tape where needed. Then use scissors to fringe the edges of all the book paper. You can be quite rough, just be careful to not cut too much of it away!

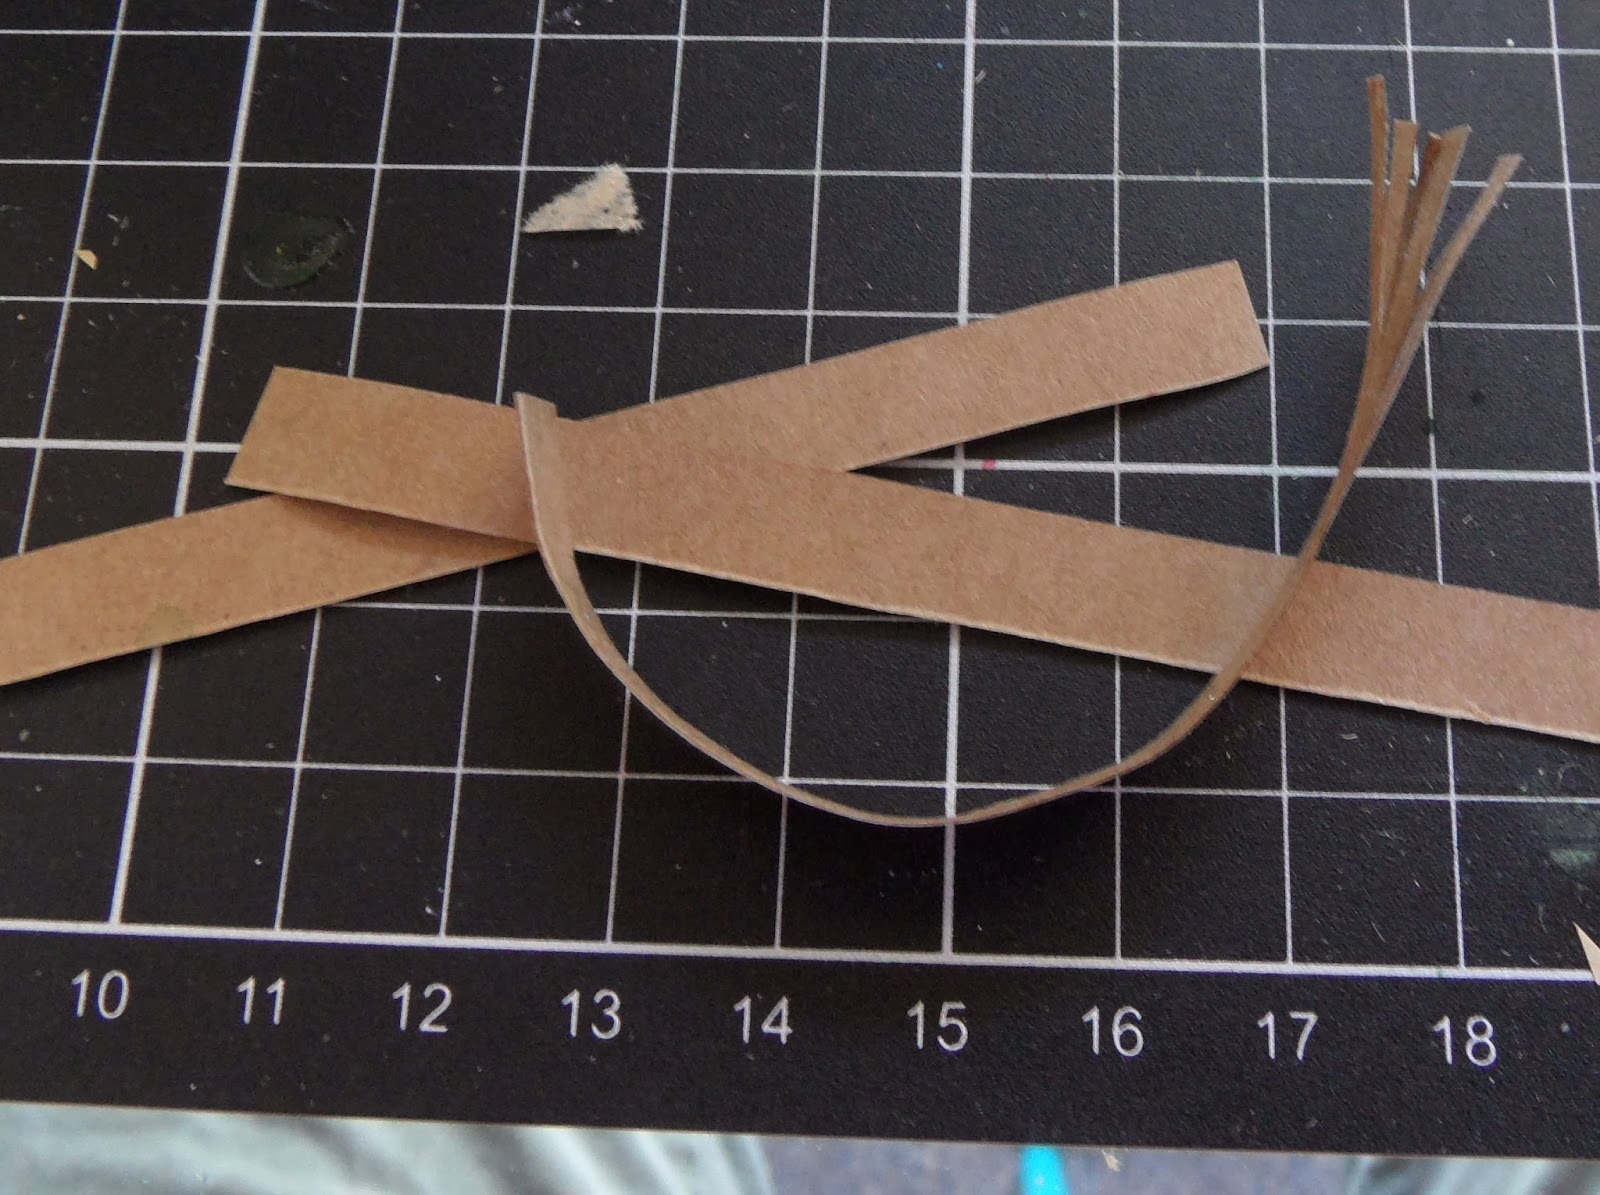
Now you need to cut some thin strips of your leftover cardstock, and then cut those strips into pieces between 1 and 2 inches each. Cut the end of each strip like a fringe about a third the way up and then roll each piece so it's curled up a little. Then take those small pieces, add a piece of double sided tape to the top (the not fringed bit), and stick them onto your tree where-ever you think they look good. You won't cover the whole tree, just add a few around it.
Now you need to take your ribbon - the big tree used about 1 and a half mtrs of ribbon. Loosely wrap it around the tree, tuck the top end into the little hole where your wire is sticking out and use your glue gun to hot glue it in place.

Tape the bottom to the inside of the tree using ordinary cello tape.

Now is the fun part! Put some thick white paint onto a palette knife and lightly scrape it over the top of the tree in various places. Then take your tree outside and spray liberally with spray adhesive. Sprinkle black and blue glitter over the tree!

Your tree is now finished except for the star. To finish off your star take the lighter gauge wire and wrap it around the star. To secure the ends all you need to do is wrap tightly. Keep wrapping until you are happy with it, there's no right or wrong way to do it.


Once your star is done, you need to secure it to your tree. To do this simply thread the long piece you left sticking up from your tree straight through the middle of your star and wrap the top end around part of the star to secure.

And then you're done. Stand back and admire your unique and individual Christmas Tree Paper Sculpture!


|
They would look stunning in my house ;o) they're lovely and a great tutorial as well, wish I had time to make them..
ReplyDeletexxx
They would definitely suit your Christmas decor! Maybe a set will land on your doorstep anyway.....
DeleteI love this! Great tutorial. I'm pinning it. :)
ReplyDeleteThanks Jessica, pin away! Glad you enjoyed the tute! :)
Delete