Showing posts with label tutorial. Show all posts

Monday, 23 December 2013

Mixed Media Tutorial

I've had quite a few requests to learn about my technique when creating my mixed media pieces, so I thought I'd do a little tutorial for you all with the piece I'm currently working on. It is a wax based piece with collage, ink and oil pastel layered over the top of the wax.


 Your first step is to melt your wax onto the canvas. Now wax comes in many forms including basic crayons. The advantage of crayons is the range of colour you can get. I would suggest though that when using crayons you should use only pure wax crayons; some may have other ingredients in the crayon which may produce unexpected results when melting onto your canvas.


 When melting them it's useful to use hot glue to secure the lump of wax to the canvas, or use a fork or other metal implement to hold the wax in place until it melts sufficiently to not roll away anymore. Hot partially melted wax makes a big mess when it is pushed across the table or floor by the airflow from your heatgun or hairdryer! Which is how you melt it: it's so much fun to watch it melt, and you can kind of control the direction of the flow by the angle you hold your heat gun on. Varying the airflow strength will also allow you to play with different types of splatters and flow within the wax.


 Once I had covered the canvas in wax (which took a good few hours), I then used cut and torn book pages to create the shape of the tree trunk and branches. I collaged these pieces straight over the wax with Liquetex Gloss medium, which you can obviously also use as a collage glue. Once that was dry I used black and white oil pastels and drew in the shape I wanted over the collage. I used them also to shade a little to give the tree some depth.


I then used more Liquetex to seal the oil pastel, and once that was dry I used white and black ink to redraw the shape again and to add in more shading and colour on the trunk. 


 I started to add in smaller branches at this point as well.


The process basically consists at this point of alternating layers of ink, then Liquetex, then oil pastel until I'm happy with the tonal qualities of the tree.


 Once I am happy with that, I then use more oil pastels to create more colour over the wax. I'm not aiming to cover the wax, rather use the pastels to make the colour in the wax pop a bit more.


And here is the end result. Finished bar collaging the edges and a final varnish. It's a reasonably simple however quite time consuming process. But the end result is definitely worth the time put in.


I won't have any more posts up now until after Christmas and New Year. I'd like to wish all my readers and their families a happy and safe festive season, and say thank you very much for your support!

Merry Christmas To You All!


Enter your email to be the first to know about art sales and receive exclusive member only discounts! 
* indicates required
Email Format
Follow on Bloglovin
You might like to read:
Book Cover
Best Sellers List 2014: A Book You Must Read

Tuesday, 19 November 2013

How To: Christmas Tree Paper Sculpture


A gorgeous pair of Christmas Paper Art Sculptures, standing @ 30cm and 40cm tall.


Some mediums just lend themselves to certain things, and by it's very nature mixed media lends itself very well to sculpture. I made these two awesomely unique looking paper trees today and will be selling them at the upcoming Families On The Green fete. I thought that the timing was wonderful to allow me to share a tutorial on how they were made.

They are fairly simple structures but they are quite time intensive, so you'll need to allow yourself the better part of a day to get them made. The supplies you'll need are as follows:

2 sheets of 12 x 12" heavy weight brown cardstock or similar.
Some pages from an old book, or old sheet music would look great as well.
Approximately 3 mtrs of ribbon of your choice.
Roughly 76" (or 2mtrs) of 20 gauge copper wire.
A full 30mtr  (32 yards) spool of 26 gauge copper wire.
Double sided tape.
Thick white paint (I use Matisse Structure).
Black and Blue glitter.
Spray Adhesive.
Hot glue and glue gun.
Needle nose pliers.
Scissors.
Paper doilies (optional).
Green watercolour (optional).
Small amount of cello tape.
Small amount of brown craft or framers tape (the waxy kind).


First off you need to make two cone shapes from your cardstock. I used the whole 12 x 12 sheet for the bigger one, and I cut a square about 8 x 8" for the second one. (You'll use more of that second sheet later on so don't get rid of it). To make the cones, simply roll from one corner in towards the diagonal opposite corner and allow the shape to form itself naturally. Adjust it until you're satisfied with the size and then tape it at the top and the bottom. 

All of the following instructions are written for one tree - simply reduce the size of the wire and ribbon needed by about a third and repeat all the instructions for the second tree.


Your next step is to make the stars for the tops. To do this, cut two 12" pieces of the heavier 20 gauge wire and roughly form each into a triangle shape. Don't be too concerned about getting it perfect; it is an art piece after all, it doesn't need to be crisp and perfect. In fact, it will look better if it's a bit wonky. To secure the triangle simply wrap one end of the wire around the other end, and then just push it into your shape you want.


Next take both triangles and slip one inside the other so they kind of interlace each other. 


Then to secure it into the star shape simply take six 2" pieces of the same wire, and use each piece to wrap over the corners so it looks something like the image below. 


 Put your star aside for the time being and take another piece of the same gauge wire about 8" long this time. Grab your larger cone and make a very small slit in each side of the top, just big enough to thread the wire through. Then thread that 8" piece through and pull both sides of the wire up so that they are equal and then wrap one side around the other to secure it in place (as in the image below.)


Leave the other end sticking straight up, and then take some brown craft tape and wrap around the top of the cone to sort of squish it into itself as well as hold the wire in place as seen in the picture below.


Now it's time to work on the paper structure. For the larger one I used paper doilies on the bottom, but that's optional. I didn't use them for the smaller one. Take your book pages and your doilies if you are using them, tear them up (tear the pages in half down the whole page for the book pages, tear the doilies in half). *Optional step here: I used a very light green watercolour wash painted very roughly over the papers I was using and let them dry - I like it better with the green, but it's completely up to you*


 Take some double sided tape and use that to stick your papers down over the cone. Don't be too careful with it - the first layer is just to cover the cone. Overlap the pieces. I found it easier to run a strip of double sided tape right around the entire cone and then I could just slap on the paper.


Once your first layer is done, take some more tape and wrap the cone again, as in the picture below (the tape still has the paper on it in the first picture).

 Then take some more paper and roughly tear it into triangle shapes. Layer each 'triangle' over the one before it, at this layer keeping the direction all the same. IE, if the flat side of the triangle is at the bottom, put them all on that way or vice versa.


 Once that layer is done, take some more 'triangle' shapes and layer them over the whole thing in the opposite direction. Be sure to use slightly smaller triangle shapes at the top of the cone. At this point, you can also use ordinary rectangle shapes as well. Fill in any gaps, and add extra tape where needed.  Then use scissors to fringe the edges of all the book paper. You can be quite rough, just be careful to not cut too much of it away!


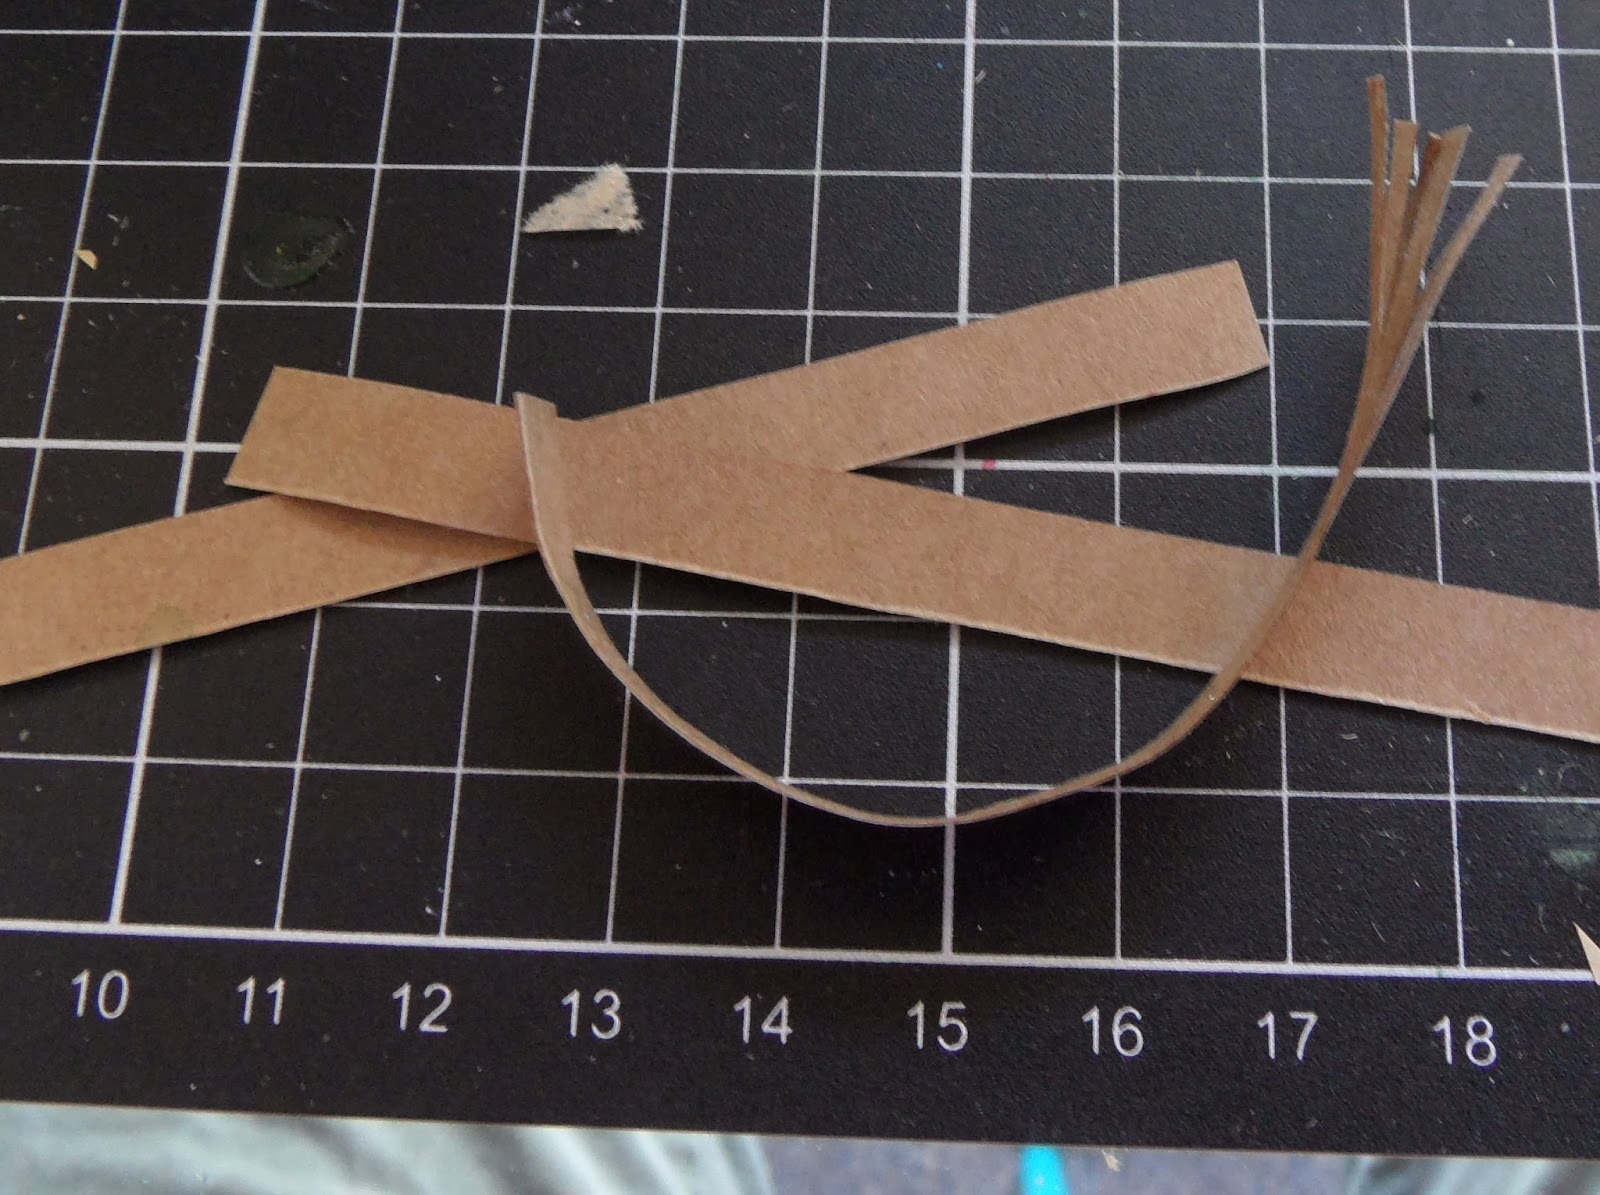
Now you need to cut some thin strips of your leftover cardstock, and then cut those strips into pieces between 1 and 2 inches each. Cut the end of each strip like a fringe about a third the way up and then roll each piece so it's curled up a little. Then take those small pieces, add a piece of double sided tape to the top (the not fringed bit), and stick them onto your tree where-ever you think they look good. You won't cover the whole tree, just add a few around it.


 Now you need to take your ribbon - the big tree used about 1 and a half mtrs of ribbon. Loosely wrap it around the tree, tuck the top end into the little hole where your wire is sticking out and use your glue gun to hot glue it in place.


 Tape the bottom to the inside of the tree using ordinary cello tape.


Now is the fun part! Put some thick white paint onto a palette knife and lightly scrape it over the top of the tree in various places. Then take your tree outside and spray liberally with spray adhesive. Sprinkle black and blue glitter over the tree!


 Your tree is now finished except for the star.  To finish off your star take the lighter gauge wire and wrap it around the star. To secure the ends all you need to do is wrap tightly. Keep wrapping until you are happy with it, there's no right or wrong way to do it.


 Once your star is done, you need to secure it to your tree. To do this simply thread the long piece you left sticking up from your tree straight through the middle of your star and wrap the top end around part of the star to secure.


And then you're done. Stand back and admire your unique and individual Christmas Tree Paper Sculpture!

I think they look stunning! They'll certainly be a talking point in your home this Christmas.


Follow on Bloglovin
You might like to read:
Sketchbooks
Sketchbooks

Wednesday, 30 October 2013

How To Make A Realistic, Life-Size Halloween Mummy for under $50

He's quite creepy when you forget he's there and catch a glimpse out of the corner of your eye.

As you all know and I've said many times, I love Halloween. So this year I thought I'd make a Mummy. I am extremely happy with how he turned out, he was cheap and easy to make, although he was a little more time intensive than I had thought it would be.

Materials were easy to find and very inexpensive, and the end result is way cooler than any store bought one you might be able to find.

So what materials do you need?

Chicken Wire, also called Bird Netting. The stuff with the smaller holes is better for this project. I bought a roll of 10 meters and it cost $15. I used less than half I'd estimate. There's still plenty left for another project. You can get this at any hardware or garden centre.

A bamboo garden torch. I used this instead of a plain garden stake thinking it would add stability, but it didn't, so a plain garden stake would probably work just as well. Cost of $3. Available again at a hardware or garden centre.

A plastic (and very unrealistic looking) skull. It was actually filled with lollies originally (I bought it last year), and it cost about $3 from Big W. 

I bought 2 meters of calico for around $10, 2 meters of cheesecloth for $12, and 1 meter of muslin for $2. (Actually that was free because it was all they had left, so the lovely lady at Spotlight gave it to me with my other fabric!)

I also used about half a meter of polyester wadding that I had left from a quilt, 2 pairs of old gardening gloves, some duct tape, and a lot of old fabric scraps and old sheets. These I had around the house so they didn't cost me anything, but you can pick up old sheets at Op shops (Thrift stores) for next to nothing, and duct tape, wadding and gardening gloves are also quite cheap if you don't have them already. You will also use cable ties or wire (even garbage bag ties will do), and a little bit of glue.

So for less than $50, I have all my materials to make my life size Mummy (he's right around 5').

The Process

(this post has LOTS of images to help you make him!)

Plastic Skull and Bamboo Garden Torch
I took the torch part of the bamboo garden torch, and turned it upside down so that the wider part becomes my base.


I have a tendency to injure myself when making things - I'm a bit of a clutz. So safety first! 
I wore safety goggles because making a hole in the plastic skull was way harder than I thought it would be. I broke a piece off my craft knife (which is when I put the goggles on!), and switched to using scissors to scrape a hole in the plastic. This took me a good 30 minutes or so.


Scraping away to make a hole for the bamboo torch

He doesn't look very mummy like yet!


Once I had the hole big enough, I plonked his head on top and voila! The base structure for the Mummy is complete!

 
Chicken wire body


To make the body, I simply cut off about a meter of chicken wire using tin snips, and then rolled it into a rough cylinder shape. I then squeezed the top corners together to form the shouders, and squeezed the bottom to make the hips skinnier. 


Attaching the body to the structure.


 I used the wire that the roll of chicken netting was held in place with, to secure the body to the stake, as seen above.


How it looks so far.
Attaching the arms

I made the arms and legs the same way as the body, just using less chicken wire. A basic cylinder that was squeezed to make it arm or leg shaped, and then I used cable ties to secure it to the body. (You could use wire or garbage bag ties, or anything you have on hand, I just had cable ties on hand and they made it easy!)

He's looking a little more formed now.
I used the wadding and duct tape to give him some shoulders.

I filled the gardening gloves with leftover bean bag beans and taped them on to his wrists.

I did the same for his feet - I used heavier duty gloves because they were flatter.

I used beans, but you could use anything to stuff the gloves: cushion filling would work well, but so would plain old plastic shopping or freezer bags. Anything to fill them out but keep them soft.


I used an old pillowcase cut into strips to bulk out his neck.

Then I started wrapping the arms and hands, using duct tape to secure in place.
His body was slipping too low, so I used cable ties to secure one side to the other, and both sides to the neck.
Then I kept wrapping, using cut up strips of fabric roughly 3 inches wide.

My fabric strips were roughly 3 inches wide at this point, but for the fingers I made the strips only about an inch wide and about 7 inches long. It's important to wrap the fingers individually and with small strips of fabric to achieve an authentic look.  Because my Mummy's body kept slipping down, I used cable ties to make a chain and link both sides to each other. Then I used more cable ties to secure the chains to the neck. This was definitely a bit of a 'secure it any way you can' moment. Don't forget also, that everything you use will be covered up, so it doesn't matter how messy it is at this point. (It's also helpful to have someone hold the Mummy while you wrap!)

While I was wrapping him, I made sure to pull tightly so that I could control the shape of his chest. I made it skinnier at the waist and hips and kept it wide at the shoulders. Because chicken wire is so pliable, it was easy to keep adjusting his shape, pushing and pulling the wire until I was happy with it, right up until the last wrapped layer.  When wrapping these initial layers, you can simply tie the ends off, or just tuck it in to either the chicken wire or another layer of fabric. You will secure the final layers with glue which will hold all these initial layers in place.

The hands are starting to look much more 'mummified' having covered up the original duct tape

To further secure the chest in place, I used longer strips of fabric and wrapped it more like a 'mankini' in between his legs and up over the shoulders, then over the head to hold everything together.

It was at this point I thought his right leg was too skinny, so I used toilet paper to pad it out.

Almost ready, just the final layers of 'proper' fabric to go.

Once he was all secure, and I had covered up all the duct tape, I tore my store bought fabric into strips about 2 inches wide, except for the hand pieces, which were 1 inch. I then proceeded to wrap the final layers, this time securing the start and end of the pieces with a little dab of glue. I used Aquadhere because it's a strong PVA that's pretty water resistant. I think he has about 3 full layers of fabric on him here at this point.

Close up of the hands and feet - crisscrossed feet and fingers wrapped individually
I tucked in the final layers and secured with a dab of glue.

I'm not sure what the neighbours would have thought when we took him to the front yard to age him with coffee!
I used 2 jugs of instant coffee, and poured plain water over him as well to dilute some parts.


 And so here he is all finished! We left him in the laundry to dry overnight, but the smell of coffee was so strong that the next morning I took him outside where he has stayed ever since! The smell has worn off though, and he looks suitably old and dirty.

So there you have it. Like I said, he was pretty time intensive, but if you don't have a baby that needs your attention you could probably do him in a day. A full day, but a day nonetheless. He took me two.

The bamboo torch end will be useful for holding him in place. That end will be buried in a pot of sand, but you could just as easily pile some heavy pumpkins around that to steady him.


Sarah


More the Merrier Monday